
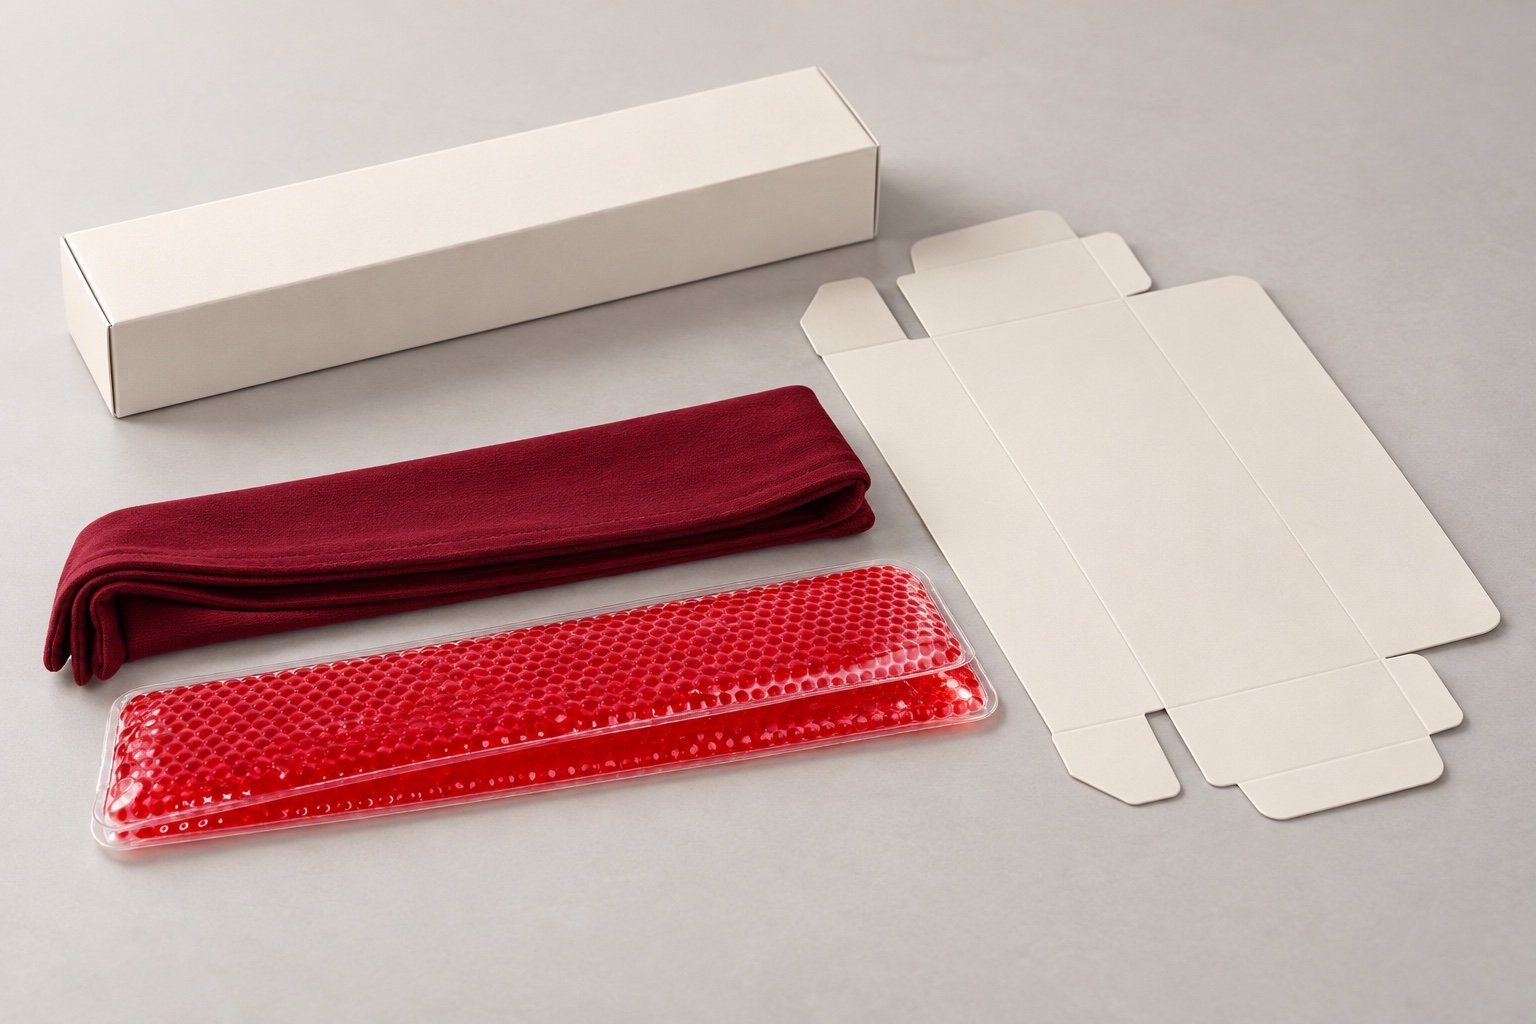
A packaging dieline tells a converter where a carton is cut, folded, and joined, and tells the artwork team where print can safely go. For a custom ice pack, the drawing must also accommodate the filled pouch, its sleeve or strap, and any instructions supplied in the box. An attractive flat artwork file does not prove that the finished package will fit.
The essential custom ice pack packaging dieline requirements are an approved structural drawing, unambiguous dimensions, separated production markings, agreed artwork clearances, a usable barcode area, and a revision-linked physical proof. This checklist is for folding-carton handoff between brand, ice pack supplier, and packaging converter. Flexible pouches and other packaging formats need their own converter-specific drawings.
Cover: a packaging concept illustration, not a production-ready dieline or approved packout.
On this page
Lock the packed contents before locking the carton
Start with the exact item that will enter the box: filled pack, cover, straps, individual bag, leaflet, and any additional inserts. Record the intended orientation and folding arrangement. A box sized around an empty pouch or a tightly compressed mock-up may not represent the finished retail unit.
Ask the converter to identify whether quoted dimensions are internal or external, which orientation defines length, width, and depth, and which tolerances apply. Board thickness, folds, glue flaps, and inserts can affect usable space. Do not treat a dieline’s overall flat size as the box’s finished internal dimensions.
For multi-component formats, the cold therapy wrap product range shows why a pack and its textile accessories should be evaluated together. For channel selection, unit-pack options, and carton strategy, use the broader private-label ice pack packaging guide. Here, the task is to turn that choice into a usable production file.
What must the structural drawing identify?
Use the converter’s confirmed master dieline rather than reconstructing one from a photograph or an old PDF. The file should make these elements distinguishable:
- Cut lines: the outline and any openings that will be cut.
- Fold or crease lines: the intended panel boundaries and closing sequence.
- Joining areas: glue flaps or other joining zones, including any print or coating restrictions the converter specifies.
- Panel identity: front, back, sides, top, and bottom, with the intended reading direction after assembly.
- Artwork boundaries: bleed and text-safe areas agreed for this board, print process, and converting method.
- Document identity: SKU, drawing number, revision, units, scale, material reference, and approval status.
Line colors alone are an unreliable handoff. Include a legend and agree on how the production workflow interprets each element. A dashed line may mean a fold in one file and a perforation in another.
The Ghent Workgroup’s packaging guidance explains the use of additional PDF objects and metadata for processing steps such as cut contours. Its work relates to ISO 19593-1. Ask the converter whether its workflow supports these structured processing steps; do not assume that naming a layer “dieline” makes the file compliant or production-ready.
Keep cut, fold, bleed, and safe areas separate
These boundaries answer different questions. The cut line is where material is intended to end. Bleed extends artwork beyond a trim boundary to accommodate production variation. A safe area keeps important content away from trimming, folds, and other vulnerable positions. Fold lines define where a flat panel changes direction in the assembled carton.
There is no single bleed or safe-area value that this guide can responsibly prescribe for every pack. Obtain the converter’s values and tolerance notes for the selected process. Keep required copy, logos, and identifiers away from risky edges unless the approved layout specifically accommodates them.
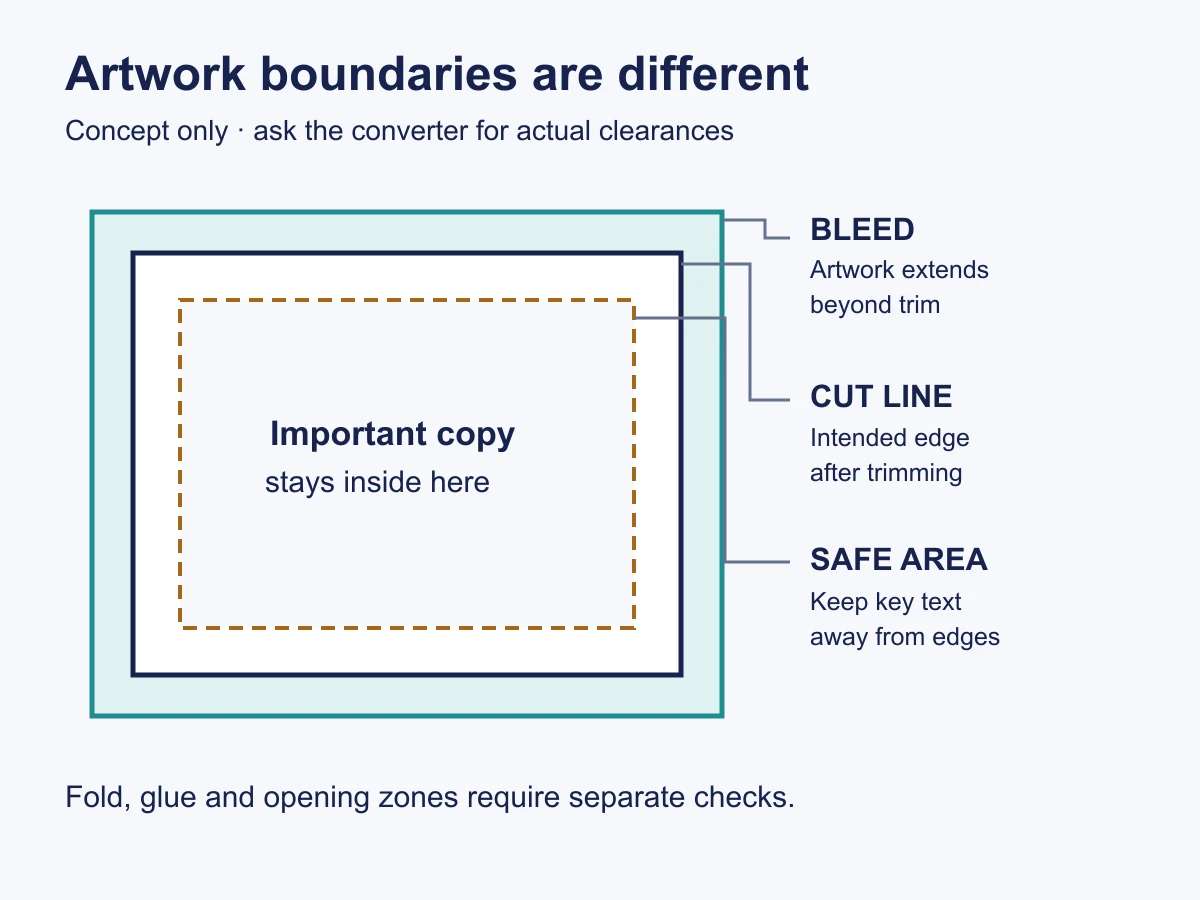
Review small type at actual printed size. A high-resolution screen mock-up can hide cramped instructions or an awkward panel break. Use the separate logo artwork file guide for source graphics rather than flattening the entire design into one low-resolution image.
Check what will actually print
Ask for an output proof that distinguishes printable artwork from structural reference information. Inspect whether cut and fold annotations could accidentally appear on the printed carton, whether a required white-ink or finishing layer has been omitted, and whether the agreed PDF export retains the converter’s required information.
A PDF that opens correctly on a laptop has not necessarily passed the converter’s preflight. The Ghent Workgroup’s specification framework includes packaging processing-step requirements; the appropriate file profile and preflight checks still need to be agreed with the actual print provider.
Reserve barcode space before the design becomes crowded
Provide the approved identifier and agree which barcode is needed for the sales channel and package level. Reserve the symbol, its quiet zones, and human-readable information as one planned area. Keep that area away from folds, joins, openings, and overlaps that could distort or obscure it.
GS1’s barcode implementation guidance ties barcode size, placement, and quality to the scanning environment. It also recommends coordinating with packaging and printing specialists so a symbol is not hidden by folds, flaps, or another layer.
Do not shrink a supplied barcode simply to fill a spare corner. If a retail or distribution partner has specifications, attach them to the artwork brief. Check the printed, assembled package using the verification requirements agreed for the channel. A successful scan on one phone is not equivalent to a barcode-quality verification report.
Once the converter has reserved the physical space, use the private-label ice pack barcode handoff guide to reconcile the packaging level, buyer SKU, assigned identifier, artwork revision, and approver before print release.
Approve three different kinds of proof
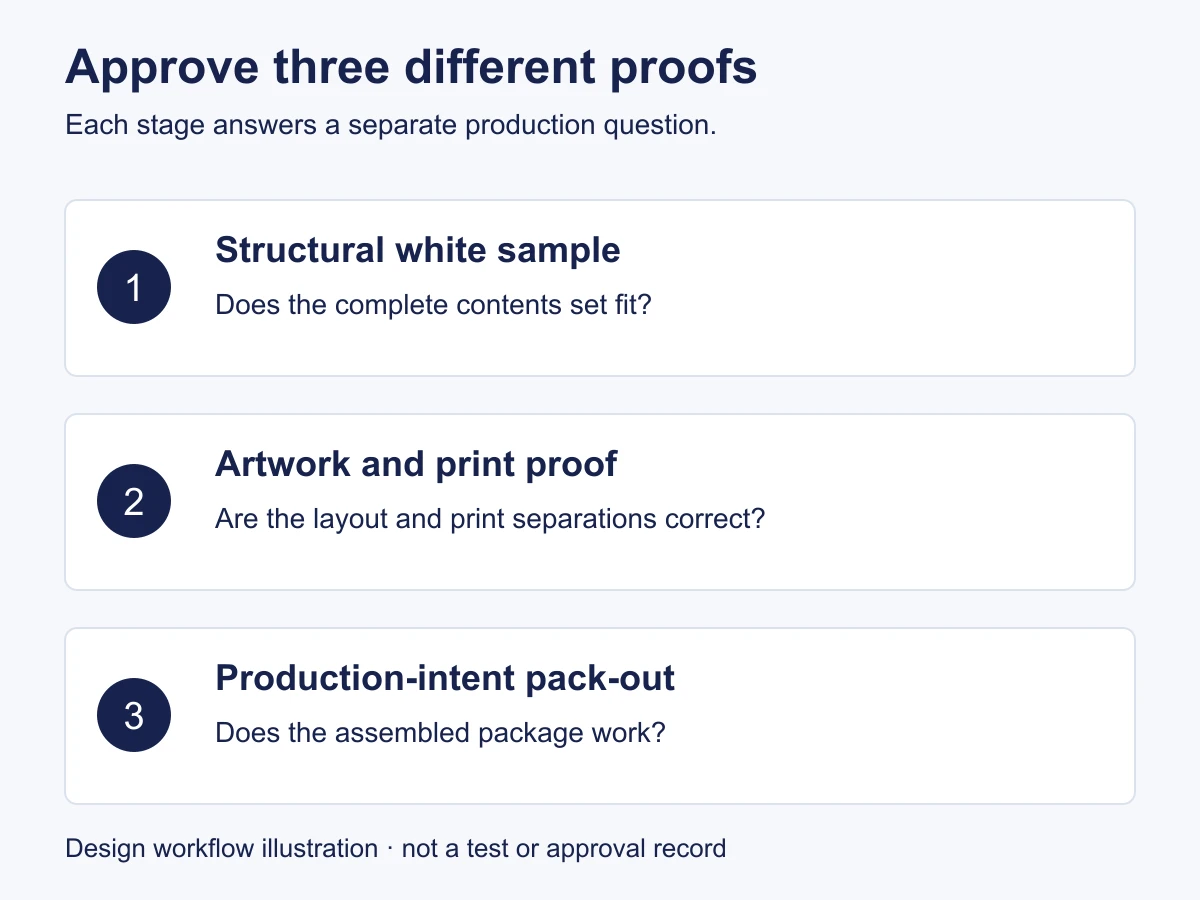
Separate structure, graphics, and the final packed assembly. Each proof answers a different question, and no single one substitutes for the other two.
1. Structural white sample
Check the unprinted carton with the representative filled pack and all components inside. Inspect closure, bulging, movement, insert retention, and whether a hard edge bears against the pouch seal. Record any provisional materials or missing components so the sample’s limits are visible.
2. Artwork and print proof
Check spelling, panel orientation, logo version, approved colors, small text, barcode position, and the separation of print from structural data. A digital proof is useful for layout; agree separately how color and finishing will be represented. See the color reference and approval guide for that decision.
3. Production-intent packed sample
Check the combined result using the intended board, closure, artwork, contents, and packing order, or explicitly list substitutions. Verify the instructions remain readable, no component catches in the closure, and the pack can be removed without pulling against a vulnerable seam. The broader distribution configuration should be evaluated separately; a neat retail box does not establish shipping performance.
Prevent the wrong revision from reaching production
Keep the structural drawing and artwork identifiers linked, but do not assume their revision numbers always advance together. A text correction may change the artwork without changing the carton. A new strap or leaflet may require a structural recheck even if the front-panel design stays the same.
A compact handoff record should include:
- Product/SKU and packed-component list revision.
- Structural drawing number, revision, units, and approved board reference.
- Artwork filename, revision, language version, and barcode data.
- Proof type and the physical sample or file that was approved.
- Open limitations, approver, approval date, and what requires reapproval.
As a hypothetical example, adding a folded instruction leaflet after approving a close-fitting box can change how the top flap closes. The right response is to repeat the relevant fit check, not to assume an unchanged outer design means an unchanged package. This is a planning example, not a report of a Cryozin order.
A packaging file handoff and responsibility worksheet
Use this worksheet to assign responsibilities before releasing artwork. It is a suggested coordination tool; the parties must agree their actual responsibilities and acceptance criteria. Keep unresolved items open rather than treating an attractive PDF as approval.
| Handoff item | Who supplies or confirms it? |
|---|---|
| Packed contents | Brand: identify SKU, sleeve/strap, leaflet, and pack order. Supplier/converter: confirm the representative contents and fit. Keep: component list revision and sample ID: ____ |
| Structural master | Brand: state format and presentation needs. Converter: confirm drawing, material, units, dimension convention, and tolerances. Keep: approved drawing number/revision: ____ |
| Artwork boundaries | Brand/designer: provide artwork against the agreed master. Converter: confirm cut/fold interpretation, bleed, safe areas, and processing layers. Keep: preflight result and artwork revision: ____ |
| Barcode and copy | Brand: supply approved identifiers, copy, and channel requirements. Converter: confirm placement and printing constraints; agree who verifies the printed barcode. Keep: approved copy and verification evidence: ____ |
| Proofs and changes | Both parties: identify the structural, artwork, and packed-sample approvals; record substitutions and unresolved points. Keep: proof/sample IDs, approver/date, and reapproval triggers: ____ |
Before sending the final files, check that the carton drawing, artwork, component list, and approval record refer to the same intended configuration. A new leaflet or strap is a reason to revisit fit even when the graphics are unchanged.
Questions to settle before sending files
Can the designer create the dieline?
A designer can propose a layout, but the packaging converter should confirm the structural master, material, tolerances, and production interpretation before artwork is finalized.
Is a PDF enough?
That depends on the converter’s agreed workflow. Supply the required production PDF and any requested editable assets or fonts according to its instructions. Keep a clearly identified reference proof so the expected appearance is not ambiguous.
Should every carton use the same bleed and barcode size?
No. The converter defines the relevant production clearances, while barcode specifications depend on the symbol and scanning environment. Reusing dimensions without checking these inputs can create avoidable errors.
Does the dieline confirm regulatory labeling?
No. It reserves and organizes space. Product-specific instructions, warnings, market claims, and other required information need their own qualified review. Do not copy preparation instructions or certificate logos from an unrelated pack.
Send a complete packaging handoff, not just a box image
For a Cryozin OEM or private-label program, prepare the selected product, packed-component list, sales channel, approved copy, barcode requirements, and any converter-provided dieline. Ask which structural and print proofs will be supplied and what remains subject to sample confirmation.
Discuss your packaging and artwork requirements before the design is released for print. A clear handoff makes unresolved decisions visible while they can still be checked on a sample.
Sources and further reading
- Ghent Workgroup: Packaging and Processing Steps.
- Ghent Workgroup: GWG 2022 Specifications.
- GS1: 10 Steps to Barcode Your Product.
Scene images are editorial concepts based on catalog references, not evidence of a factory, customer project, test or approved configuration. Catalog images illustrate visible product form only.
